

Understanding the DYNAMIXEL Control Table
Posted by Mason Knittle on 20th Jan 2026
Understanding the DYNAMIXEL Control Table
If you have worked with DYNAMIXEL servos in robotics, education, or hobby projects, you may have heard the term Control Table. The Control Table is one of the most important concepts to understand when configuring, commanding, and monitoring a DYNAMIXEL actuator.
In this article, we explain what a DYNAMIXEL Control Table is, why it is important, and how it is used with DYNAMIXEL Protocol 2.0, the Arduino IDE, and other DYNAMIXEL control software.
What Is a DYNAMIXEL Control Table
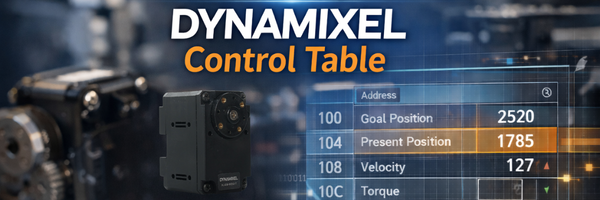
A DYNAMIXEL Control Table is a structured memory map stored inside every DYNAMIXEL actuator. It defines all of the internal data that can be read from or written to by an external controller.
Each entry in the Control Table Register has a specific address, a defined data size, and a purpose such as configuration, command, or status feedback.
Some control table items allow you to send commands to the actuator, such as setting a goal position or enabling torque. Other items allow you to read feedback, such as the current position, temperature, voltage, or load.
Every DYNAMIXEL's control table consists of 2 sections, be sure to check the e-Manual to see which addresses are a part of the EEPROM, and which are a part of the RAM;


Why the Control Table Is Important
Configuration and Setup
Many essential configuration settings live inside the Control Table. This includes items such as:
- Servo ID
- Baud rate
- Operating mode
- Torque enable
By writing values to these control table addresses, you define how the actuator behaves and communicates with your system.
Real Time Monitoring
The Control Table is also how you monitor what the servo is doing in real time. By reading control table values, you can check:
- Present position
- Present velocity
- Input voltage
- Internal temperature
This feedback is critical for debugging, diagnostics, and closed loop control.

Instead of having separate commands for every function, DYNAMIXEL uses the control table as a unified interface. Almost everything you do with a DYNAMIXEL actuator, whether configuring settings or reading data, happens by reading from or writing to the control table.
Not Every DYNAMIXEL Control Table Is the Same
One key point to understand is that each DYNAMIXEL model has a different control table layout.
Different product series such as the XM, XC, XL, P, and Y series each define different addresses, different data sizes, and different fields available in their control tables.
Therefore, you must refer to the exact e-Manual for the specific DYNAMIXEL model you are using before writing code or configuring parameters. Using the wrong addresses can cause unexpected behavior.
Control Tables and DYNAMIXEL Protocol 2.0
The Control Table is accessed through the communication protocol used by DYNAMIXEL actuators. With DYNAMIXEL Protocol 2.0, commands are sent as structured packets that specify the target servo ID, the instruction to execute, the control table address, and the number of bytes to read or write.
When you send a packet that includes a control table address, the actuator either updates that memory location for a write instruction or returns its value for a read instruction.
Protocol 2.0 supports variable length data and CRC error checking, making it a reliable and flexible way to access control table entries of different sizes.
Here is an example of how this works internally:
- Your controller constructs a read or write packet.
- The packet includes the target actuator ID and the control table address.
- A write packet changes an actuator parameter.
- A read packet returns current actuator status.
This packet based system makes interacting with control table entries consistent and efficient.
Using the Control Table in the Arduino IDE
For example, enabling torque or setting a goal position still works by writing to control table entries. The library hides the protocol details but still uses control table addresses under the hood.
Example Arduino code snippet:
dxl.writeControlTableItem(TORQUE_ENABLE, DXL_ID, 1);
dxl.writeControlTableItem(GOAL_POSITION, DXL_ID, 512);
These calls send packets using Protocol 2.0 to the control table addresses for torque enable and goal position.
Using Control Tables in DYNAMIXEL Software
DYNAMIXEL configuration and control software such as Dynamixel Wizard, RoboPlus, and the DYNAMIXEL Software Development Kit also rely entirely on the control table.
Graphical software tools allow you to browse the control table, view live values, and modify parameters without writing code. SDKs for languages like C++, Python, and more provide read and write functions that operate directly on control table addresses.
Even though each software tool looks different, the underlying mechanism remains the same. All of the mentioned software uses Protocol 2.0 packets to read and write control table entries.